
The Boo Crew Quilted Pillow Cover

Spooky season is one of my favorite times of year! I love the change of weather and fun festivities that come at this time. I also LOVE to decorate my house with all the spooky decor, so I came up with a fun pillow cover to add the perfect ghostly touch to your home. I made mine using Essex Linen because I am a sucker for texture, but you can use any fabric or color you please!

Supplies
1 1/3 yds of fabric (For this example I used Essex Linen)
24” square piece of muslin or ugly fabric (if you believe in such thing)
23” square piece of batting
12 1/2 yds of white or off white 4mm macrame cording (I used the brand “Bead Landing” from Michaels)
Thread
Coordinating thread for quilting the cover
White/off white thread - you want this to match the cording
Black thread - for the ghosts face
Rotary Cutter
Ruler
Sewing needle
Safety pins or basting spray
Marking tool
** This tutorial requires basic quilting knowledge like how to bind a quilt. If you are unfamiliar with how to do this, Suzy Quilts has a great blog post on How To Sew Binding On A Quilt that can help you with this step. **
Step 1: Cutting
To optimize your fabric and create as little waste as possible, follow the cutting diagram below.

Step 2: Basting
Once you have all your fabric and batting cut out, it’s time to baste! You are going to sandwich the front of your pillow. Lay the piece of muslin down and place the batting on top. Now place the front piece of fabric (right side up) on top of that. Baste however you prefer. For this pillow, I chose to pin baste, but if spray basting is your jam, that works too!

Step 3: Quilting!
This is the fun part! There are so many great ways to quilt using just your walking foot. And the fun part about having a wholecloth piece is that it is a completely blank canvas. So have fun and get creative with this part! If you like how I quilted mine, I did a 2” grid at a 45° angle.


Step 4: Deciding Ghost Placement
Now it’s time to layout where you want your ghosts. I wanted a more uniform look, but if you want to make it random, that would look great too! I used safety pins to mark where I wanted my ghosts. I also included a graphic to show you where I placed the ghosts on the grid.


Step 5: Constructing the Ghosts
Now lets make some ghosts! Start by cutting out the pieces of cording needed. For each ghost you will need one of each of the lengths of cording shown in the picture below. I made a total of 18 ghosts, so you will need 18 pieces of each length of cording.

Set your machine to a zigzag stitch. You want it to be fairly wide so it catches both sides of cording as you sew down the middle. I set my stitch width to 6.0.
Fold the 4.5” piece of cording in half. Starting at the folded end, sew a zigzag stitch right down the center of the two sides. Your needle should be going into each side of the cording as it goes. Stop about 1/4” away from the end of the cording. You want to leave this unattached so that you can fluff it at the end to create the bottom of the ghost. With your needle in the down position in the cord to the right, you will pivot and flip your pillow so you will be sewing the opposite direction.


Take the 5” piece of cording and line it up next to the cording we just sewed. Zigzag right down the center of the two pieces of cording wrapping it around the first piece as you go along. Take it slow when rounding the corner. You will need to stop and pivot a few times around the curve (always making sure the needle is in the down position when lifting the presser foot). When you reach the other end of the ghost, stop 1/4” away from the edge with the needle in the down position toward the outside of the ghost. Pivot and flip the pillow again so you will be sewing in the opposite direction.


Take the 5 1/2” piece of cording and line it up next to the cording you just sewed. Zigzag right down the center of the two pieces of cording wrapping it around the ghost as you go along. Again, take it slow when rounding the corner. You will need to stop and pivot a few times around the curve (always making sure the needle is in the down position when lifting the presser foot). When you reach the other end of the ghost, stop 1/4” away from the edge with the needle in the down position toward the outside of the ghost. Pivot and flip the pillow again so you will be sewing in the opposite direction.


Finally, take the 6” piece of cording and line it up next to the cording you just sewed. Zigzag right down the center of the two pieces of cording wrapping it around the ghost as you go along. When you reach the other end of the ghost, stop and be sure to leave a long enough tail of thread so you can bury them in the next step.


Step 6: Bury Threads
Bring all the threads from the front to the back and bury them. This will ensure that your zigzag stitches don’t come out.

Fluff the bottoms of the ghosts. If there are any wild threads, you can trim them.

Step 7: Faces
Now lets bring these ghosts to life! I used a Frixion pen to mark where I wanted their eyes and mouth to be. For me, this was the scariest part because it felt so permanent and I was afraid to mess up their faces. I can assure you that no two of your ghosts will look the same, and that is what makes them so special! Some of my ghosts have tiny little eyes and a small mouth, where some of them have big ol’ eyes and a wide mouth. Each one has a different expression. Some look surprised and some look worried. It’s all part of the charm so don’t let this part scare you!

You are going to want your zigzag to be really tight, so set a short stitch length. I set mine to 1.0 with a 3.0 stitch width and that seemed to work good for the face. I do recommend playing around and making a test ghost to make sure you like how the zigzag looks. Zigzag down the length you want the eye, then backstitch back to the top of the eye. Do this back and forth 3-4 times or until you are happy with how filled in the eye looks. Repeat this for the other eye and the mouth. I found that the face looks more ghostly if you make the eyes and mouth longer than they are wide.


Bring all the top threads to the back and trim them. You really don’t need to worry about burying them because the stitching is so dense, it won’t come out.

Step 8: Squaring up
Now it’s time to square up the front of the pillow. Trim down to a 21” x 21” square.


Step 9: Making the Envelope Backing Pieces
Fold one of the longer sides down 1/2” and press. Fold that same edge down 1/2” again and press. Now there will be no raw edges showing. Do this for both of the back envelope pieces.


Topstitch along the folded edge getting as close as possible.

Place your pillow front right side down. Place each envelope piece right sides up on the back of the pillow front. The envelope pieces will overlap each other approximately 3”. Clip them in place.
NOTE: If you would prefer to make the pillow without binding, you can put your pieces right sides together, sew around the perimeter and flip your pillow right side out.


Sew a 3/8” seam all the way around the perimeter of the pillow. The wider seam allowance is important for this pillow because there will be a lot of stress on the seams when inserting a pillow form.


Step 10: Binding
This binding will be a little different than if you were binding a quilt. You will start with 4” strips rather than the typical 2 1/2” strips for a standard quilt. We need a wider binding because we have a larger seam allowance around the pillow and we want to make sure our binding wraps all the way around covering it fully.

Press your binding strips in half. Connect the strips together by placing them right sides together and sewing at a 45° angle across the diagonal. For this I used my ViviLux Laser System which I highly recommend!

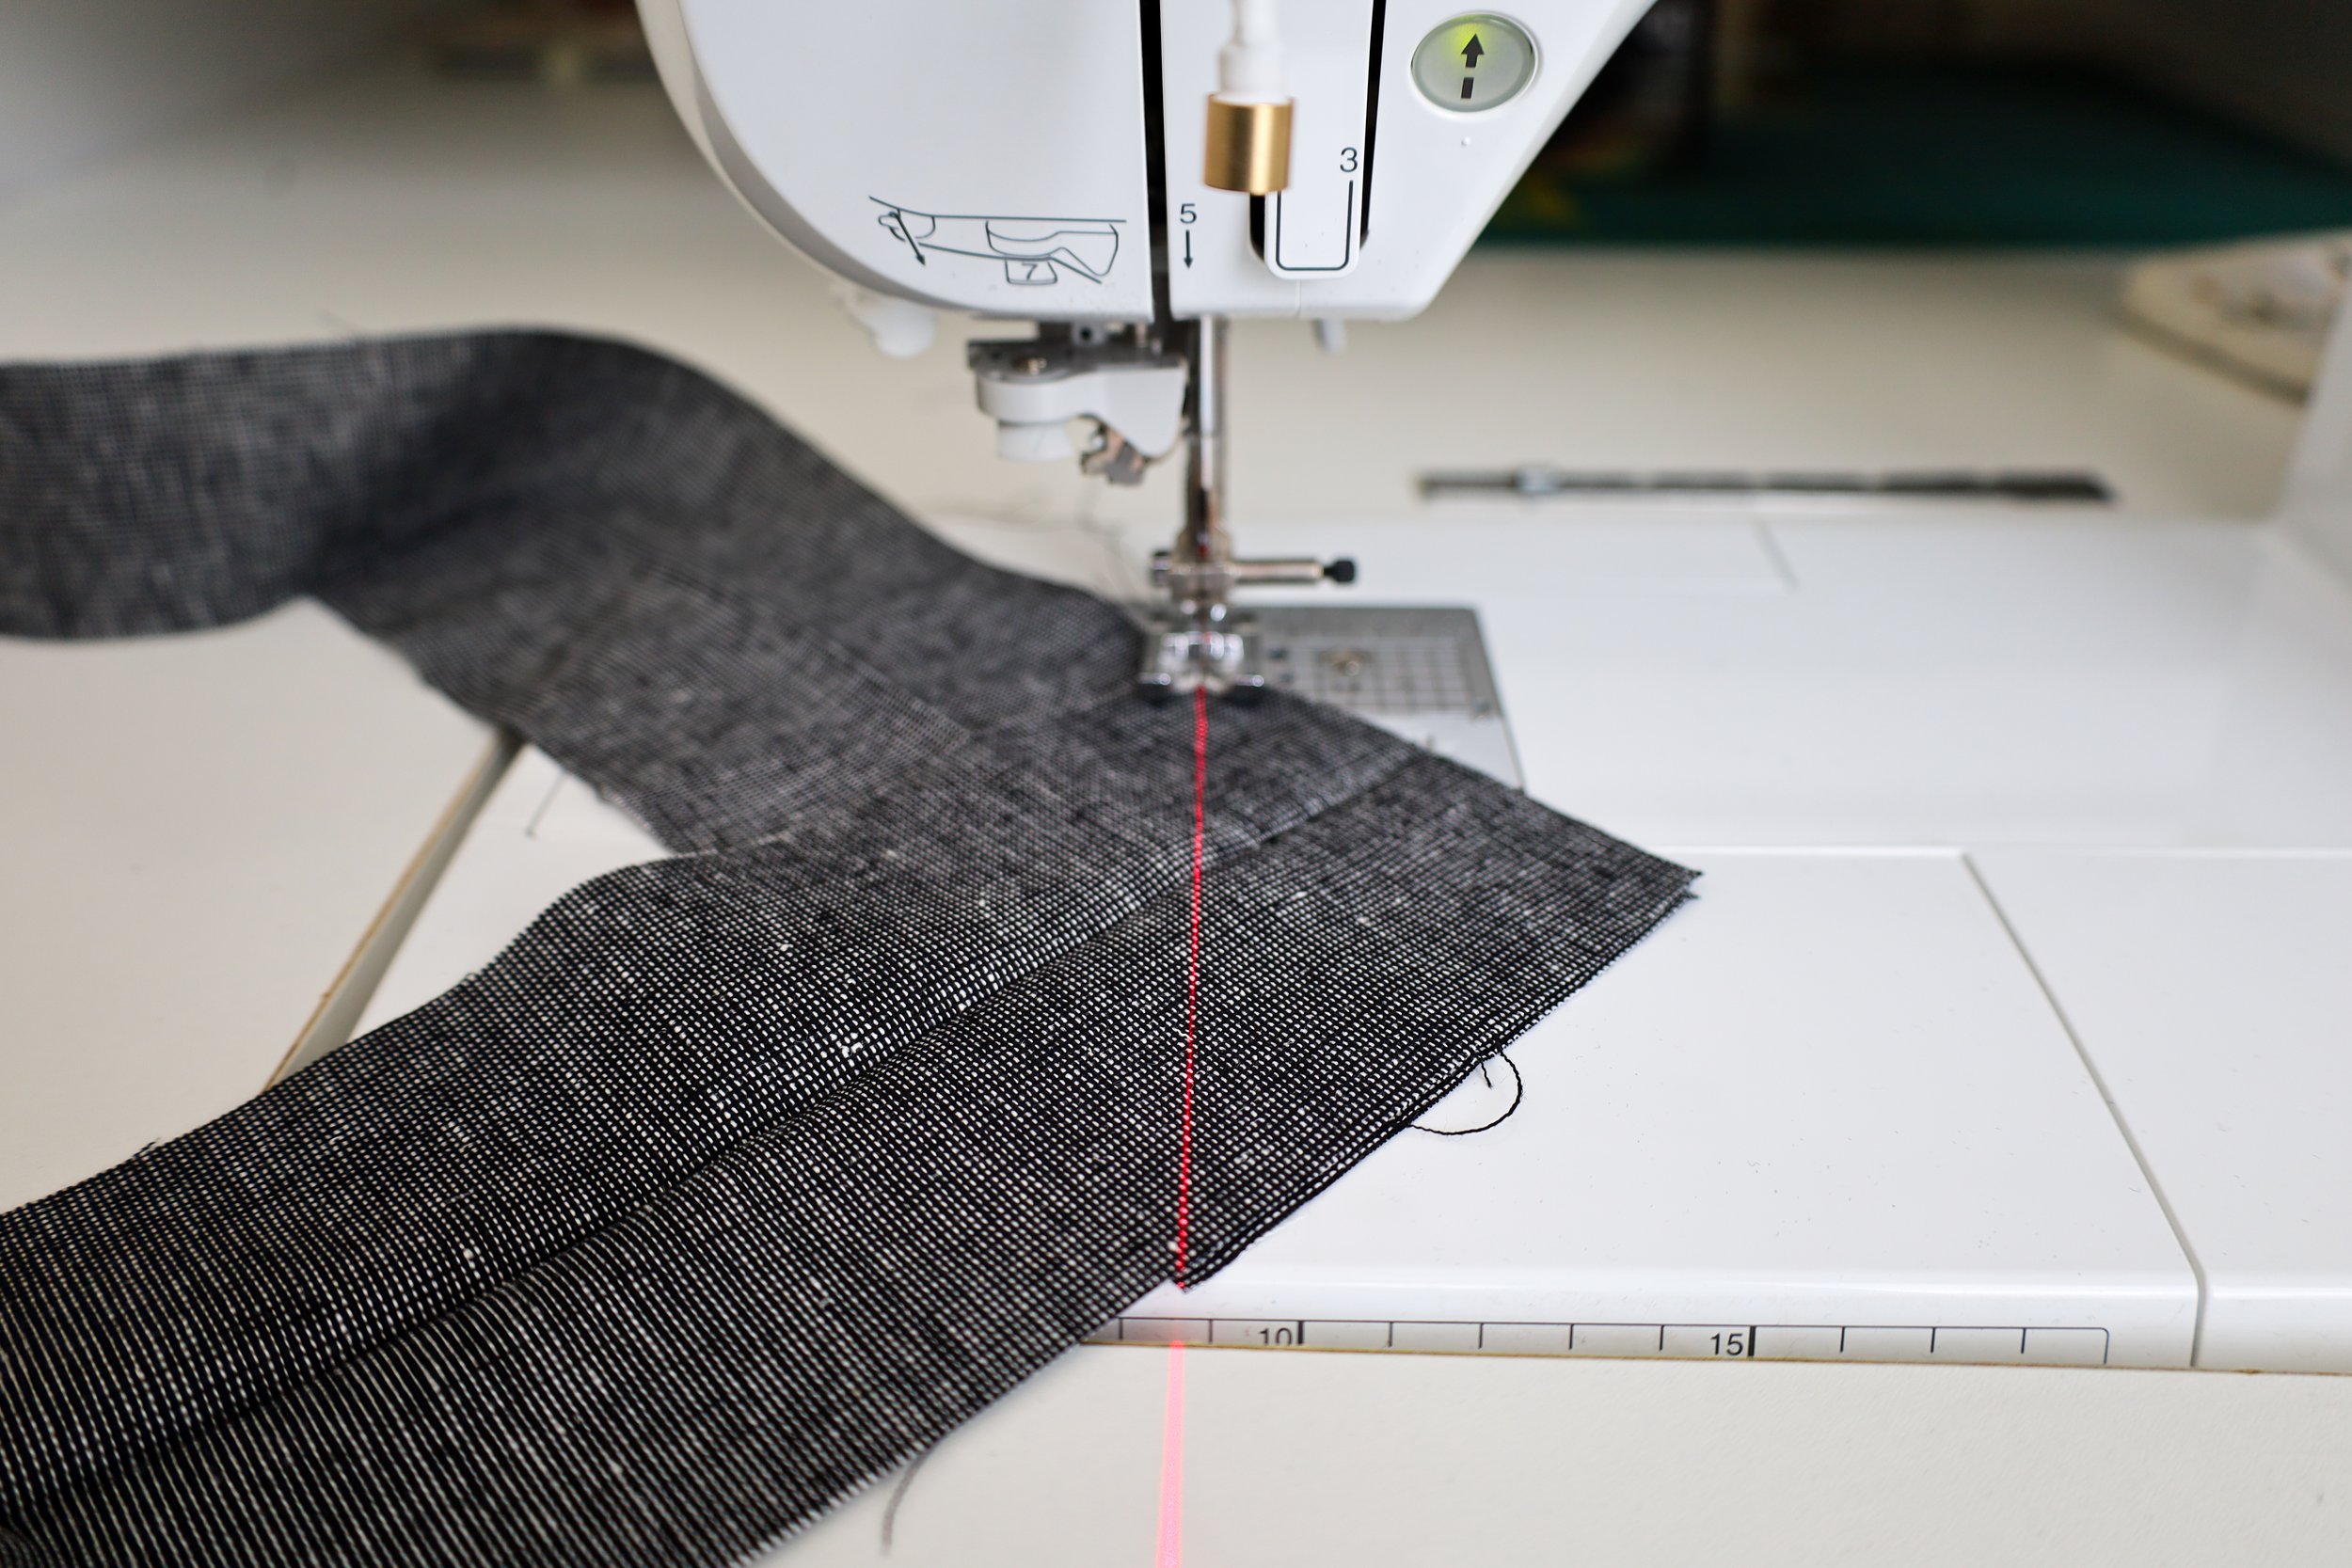


The ViviLux Laser System is such a uselful tool! I use it to get straight lines when I’m quilting rather than having to mark them out beforehand. It also works great to sew together binding strips as shown above. I have saved so much time with this tool! You can purchase this laser by clicking the button below.


I am a machine binder, so I attached my binding to the back of my pillow. If you prefer to hand bind, follow the same steps below but attach your binding to the front first. You will want to use a scant 1/2” seam when attaching the binding. Before you sew it all the way around, you should check to make sure your binding will wrap all the way around the edge. You might need to adjust your seam allowance if it doesn’t fully cover it. There are a lot of factors at play with this binding such as the batting you are using as well as the type of fabric. So just test it out before you attach the whole thing.


When you combine your binding at the end, make sure to overlap 4” since your binding is 4” wide. I can’t tell you how many times I have accidentally cut a 2 1/2” overlap when using wider binding.. Learn from my mistakes!

Once you have attached the binding all the way around the pillow, wrap the binding to the other side and clip it down. Again, if you choose to hand bind, you will be wrapping the binding to the back of the pillow. I find that pressing the binding down after wrapping it around helps so much when sewing it on!

If you are machine binding, topstitch along the edge around the entire pillow.

And finally you have the most bootiful spooky pillow! Happy Quilting!

