
Trimming HRTs Without Tears: A Foolproof Method for Perfect Points

I think most quilters would agree that the half rectangle triangle can be one of the most intimidating blocks. I used to steer clear of them because my brain had such a difficult time making sense of the trimming process. That was until I found this method for trimming ANY size half rectangle triangle without making my eyes go crossed and my brain turn to mush! My favorite part about this method is that it doesn’t require a fancy tool or ruler. All you need is a piece of printer paper, a pen or pencil and a standard quilting ruler that is at least 1/2” larger than your desired HRT (finished size). The example for this tutorial shows how to trim a 2” x 6” HRT, but this method can be applied to any size half rectangle triangle.
Lets get started!
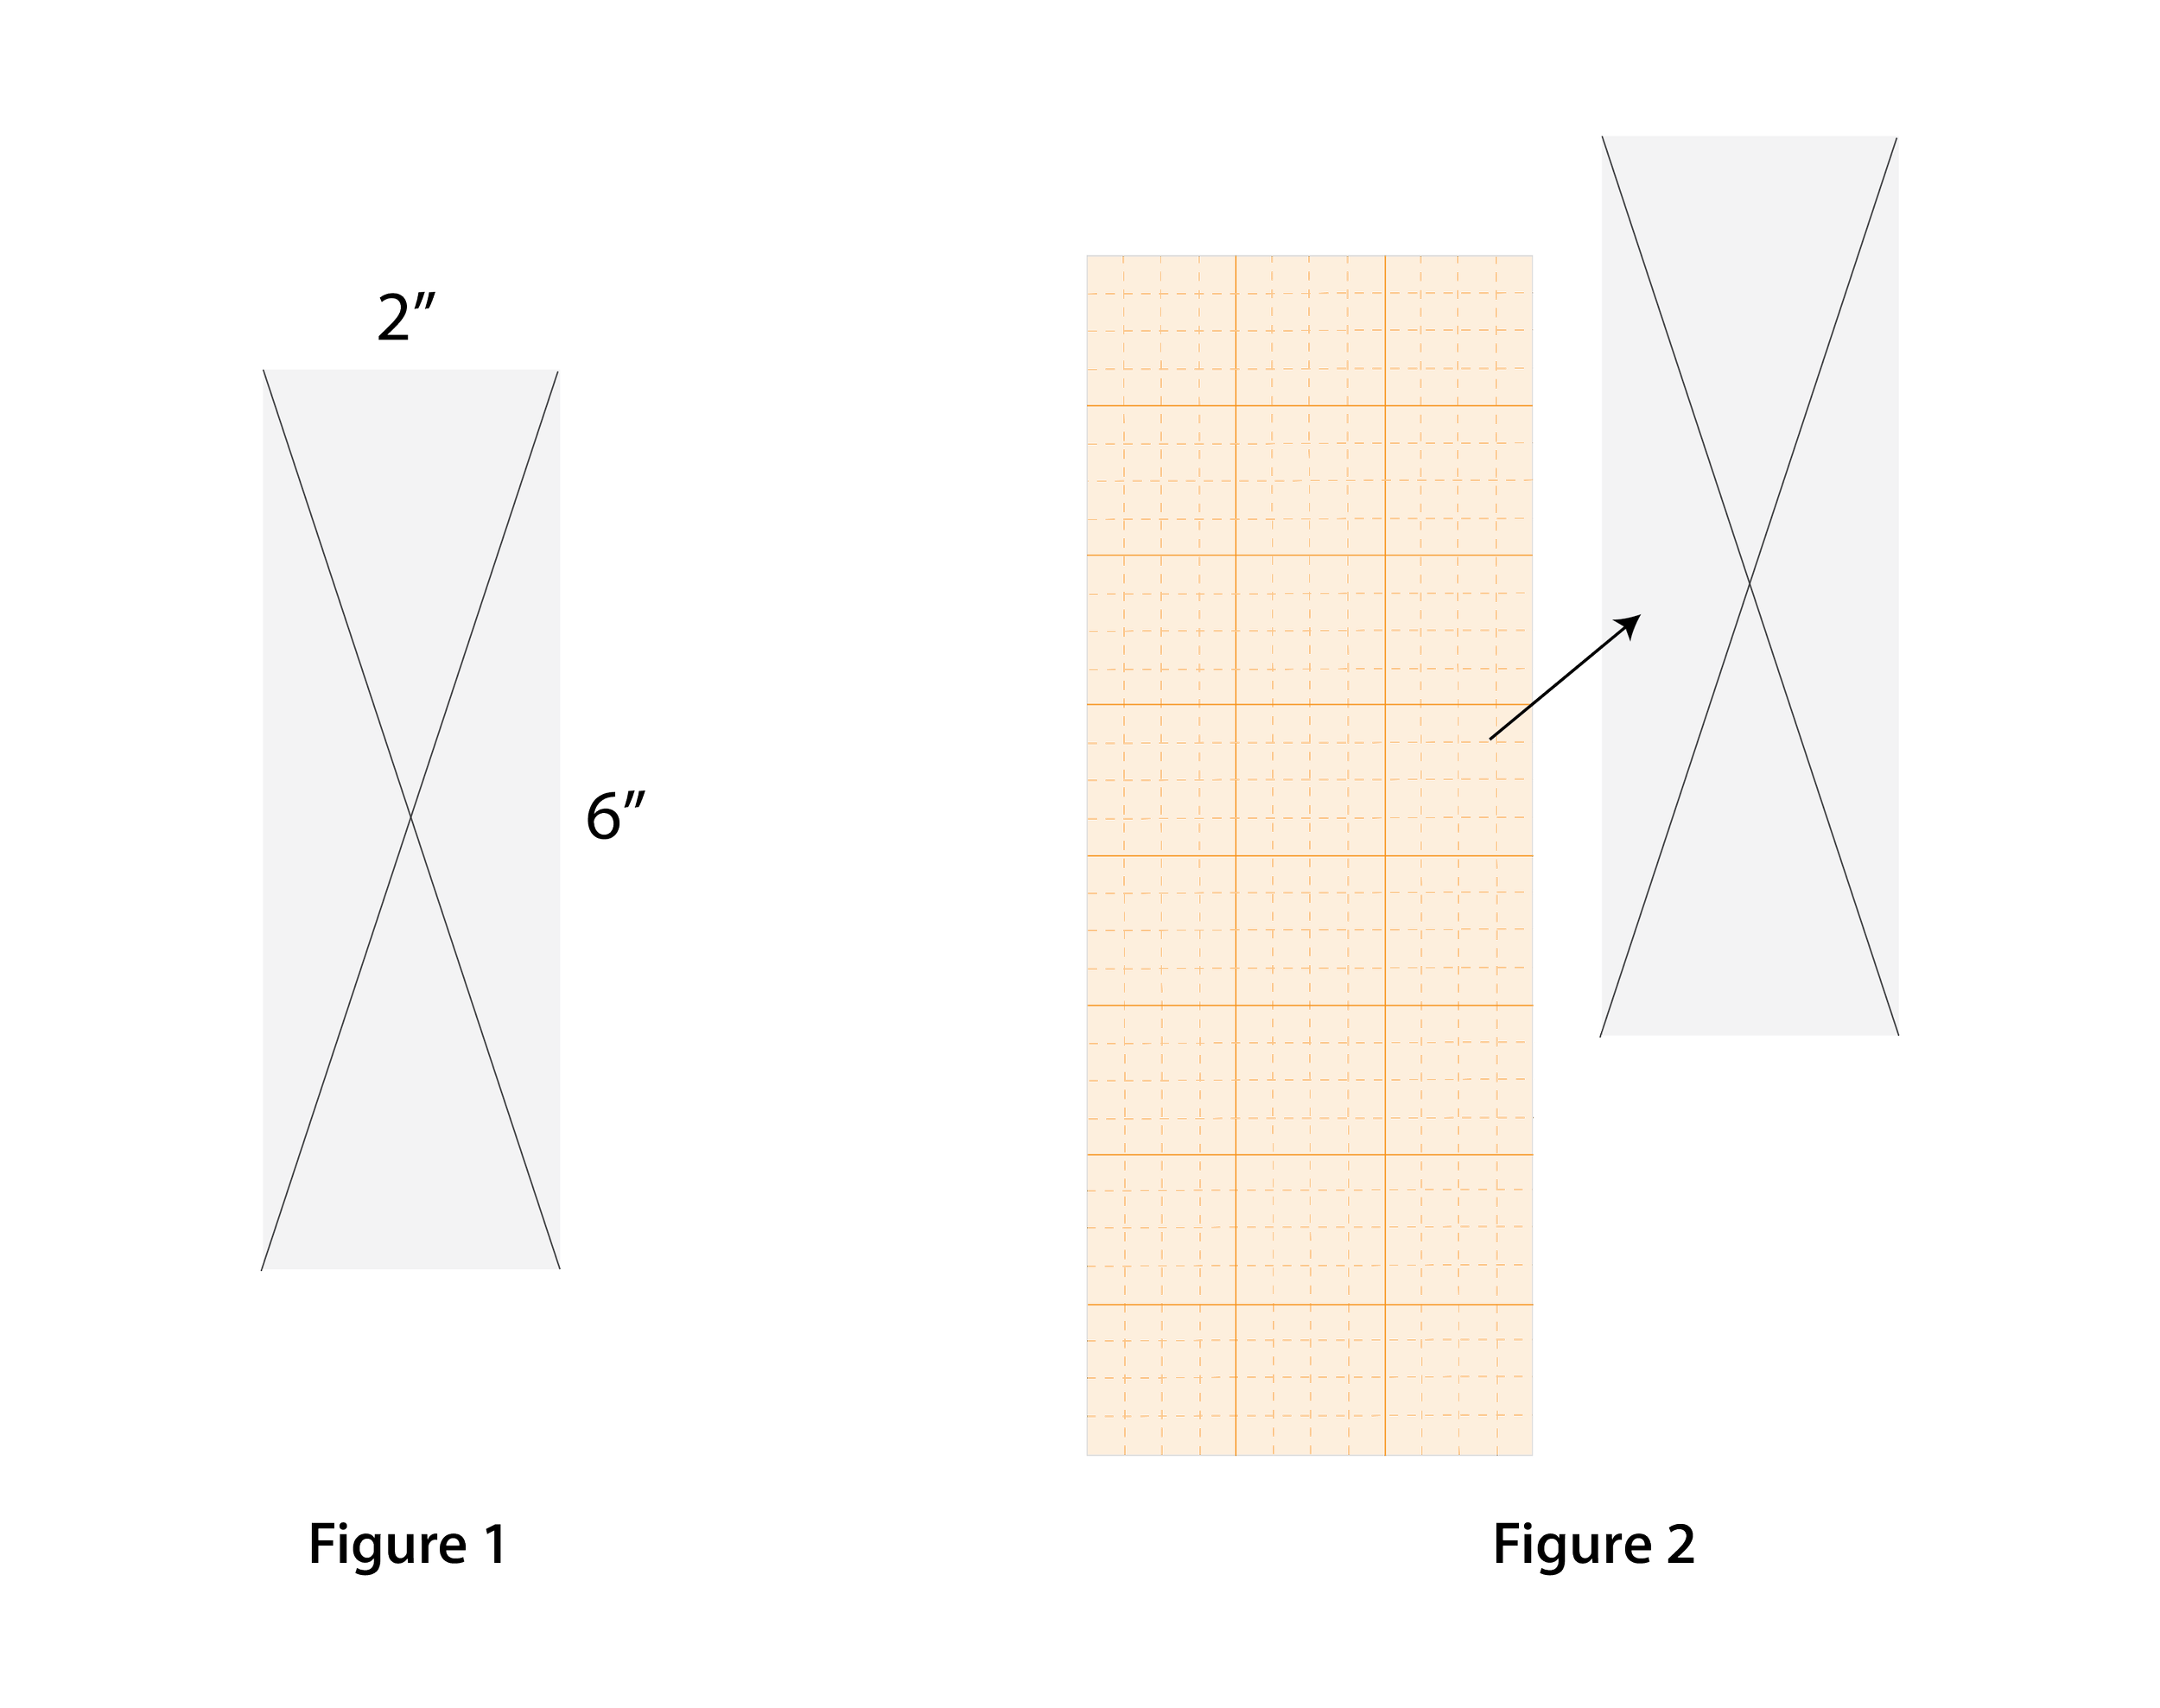
Start by cutting out a piece of paper the size you want your finished block to be (once sewn in). In this example, our finished HRT will be 2” x 6”, so this is the size paper we need. (Figure 1)
Draw diagonal lines from corner to corner as shown. (Figure 1)
Place the ruler on top of the paper so that the diagonal lines show through the ruler. (Figure 2)

Tape the paper to the underside of the ruler 1/4” away from the top and right edge as shown making sure the paper is attached securely to the ruler and will not move. This 1/4” is the seam allowance. (Figure 3)
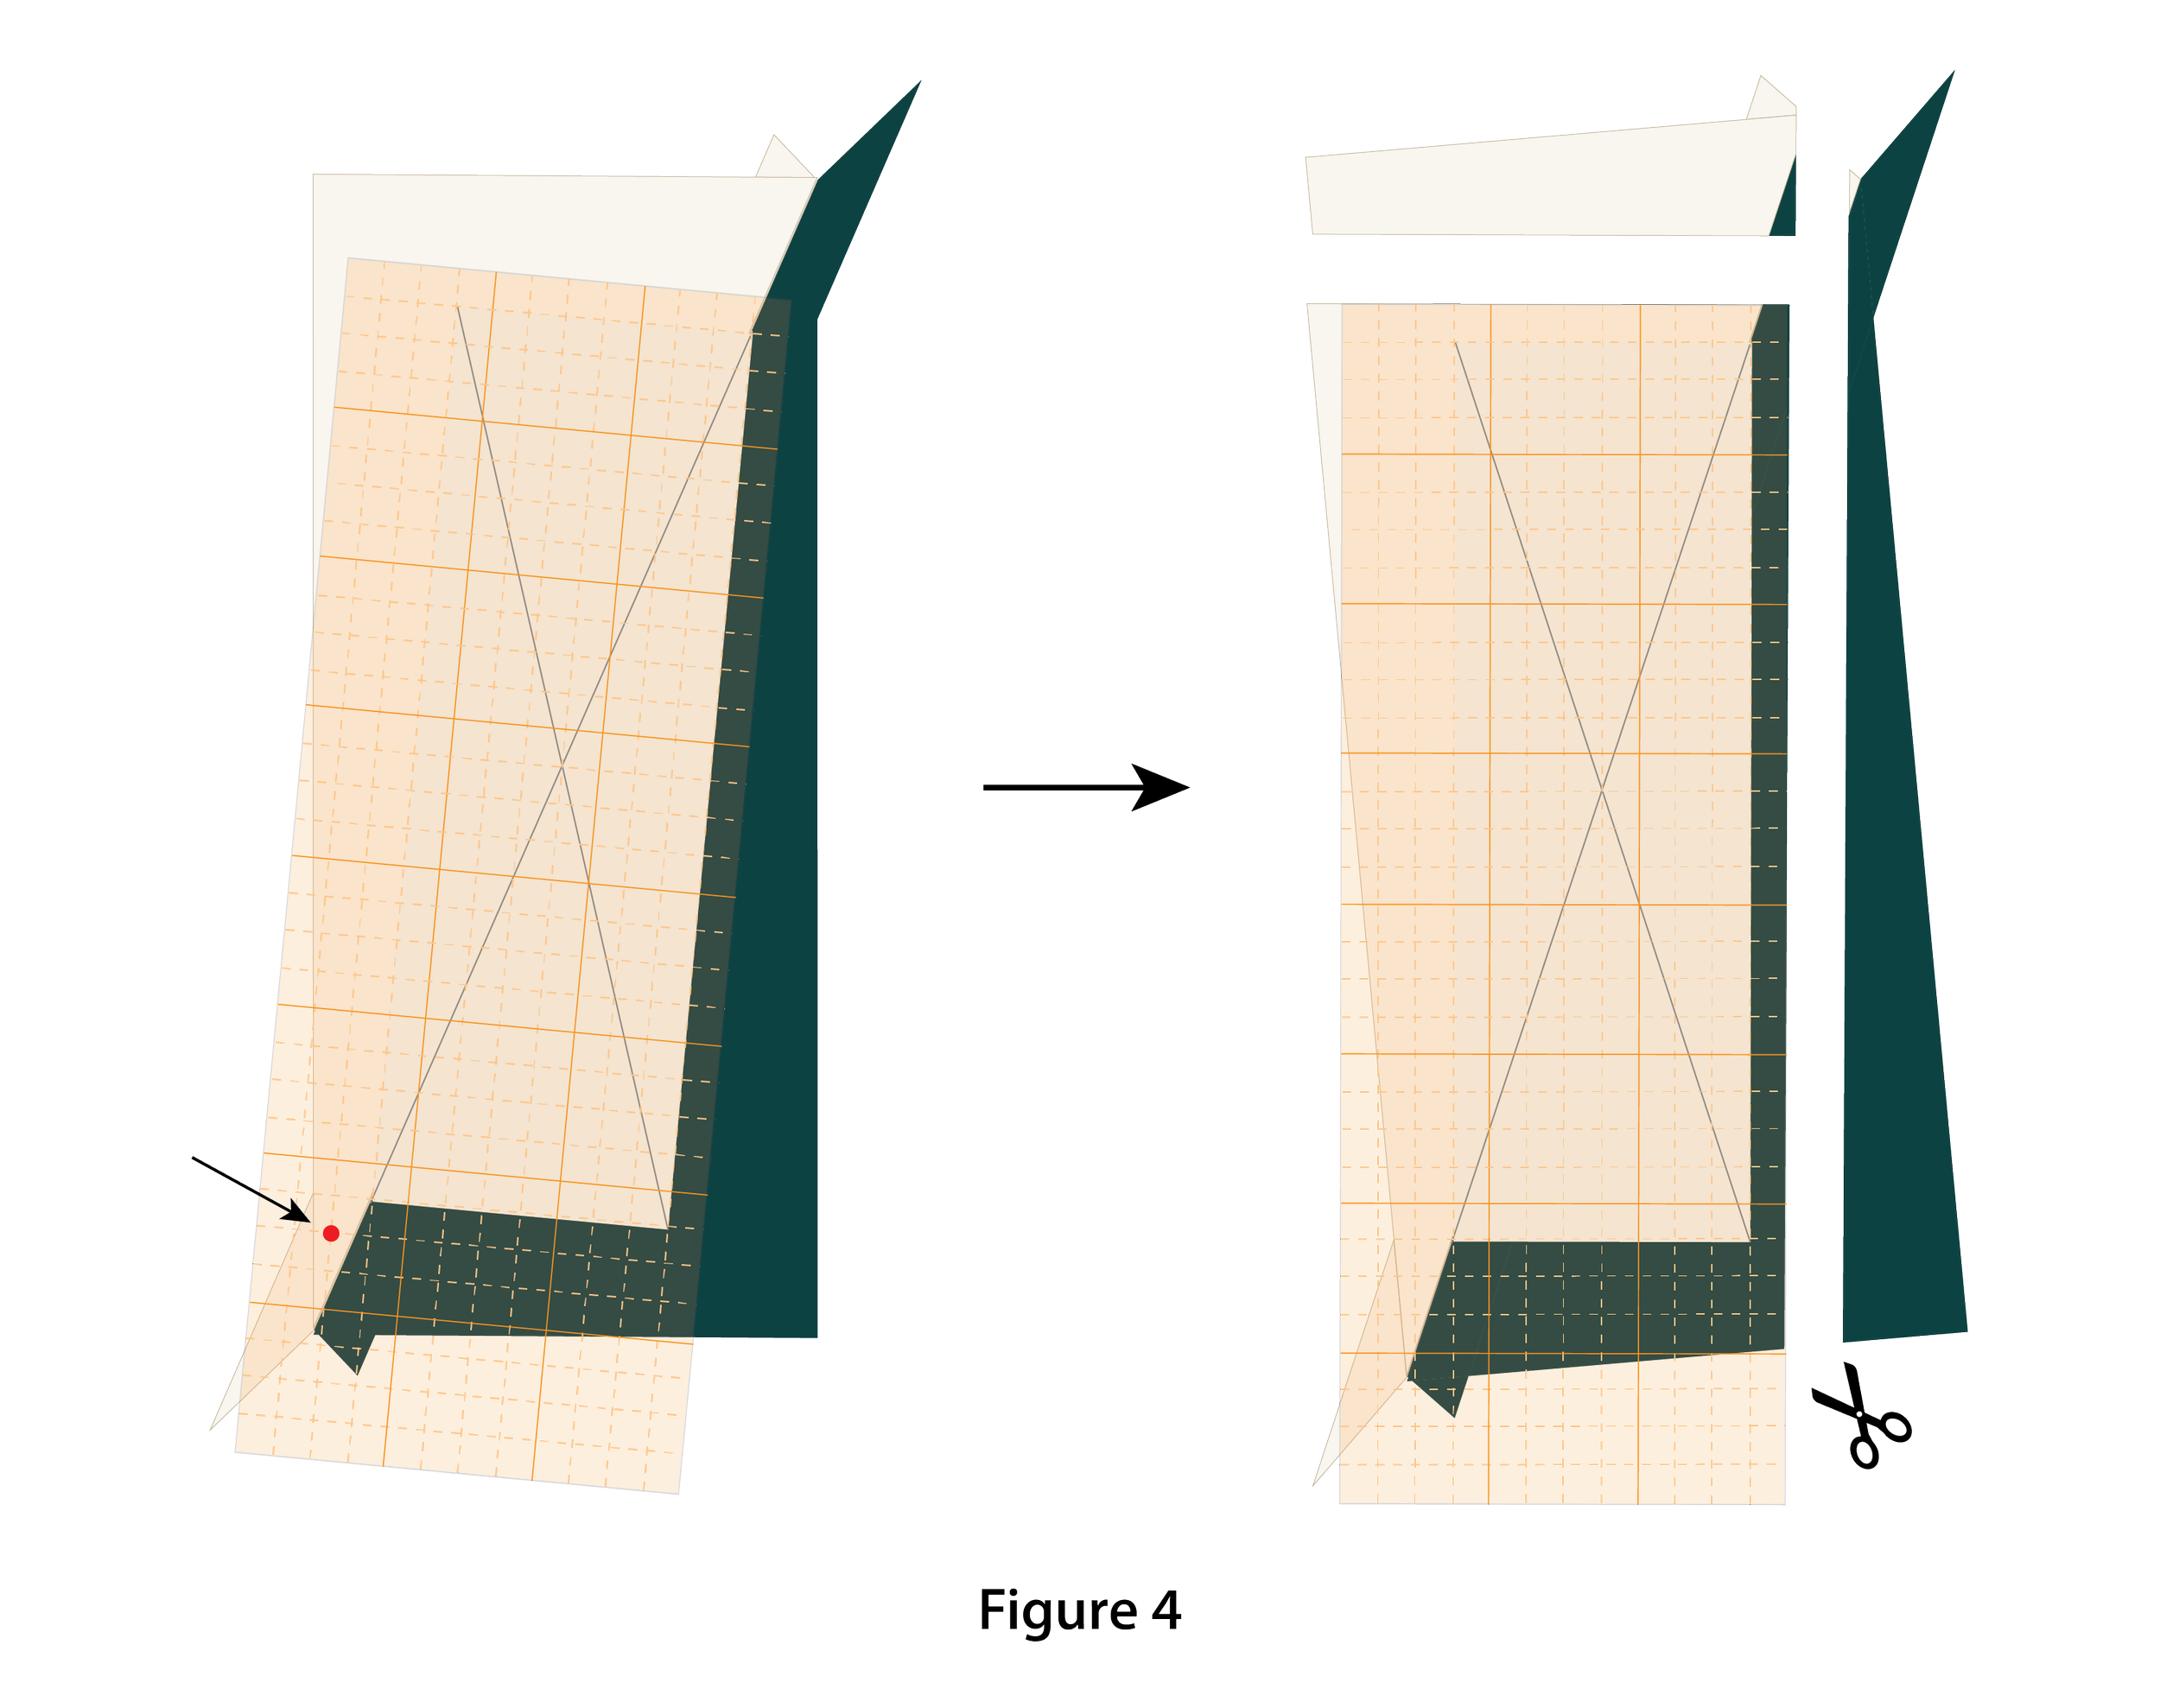
Place the ruler on the HRT, matching up the center seam with the line on the piece of paper. Trim as shown.
(Figure 4)
Note: Be sure to leave enough cutting room on the bottom left corner . The red dot shows where the other corner will be trimmed.

Flip the HRT and again match up the center seam with the line on the piece of paper. (Figure 5)

Trim as shown. (Figure 6)
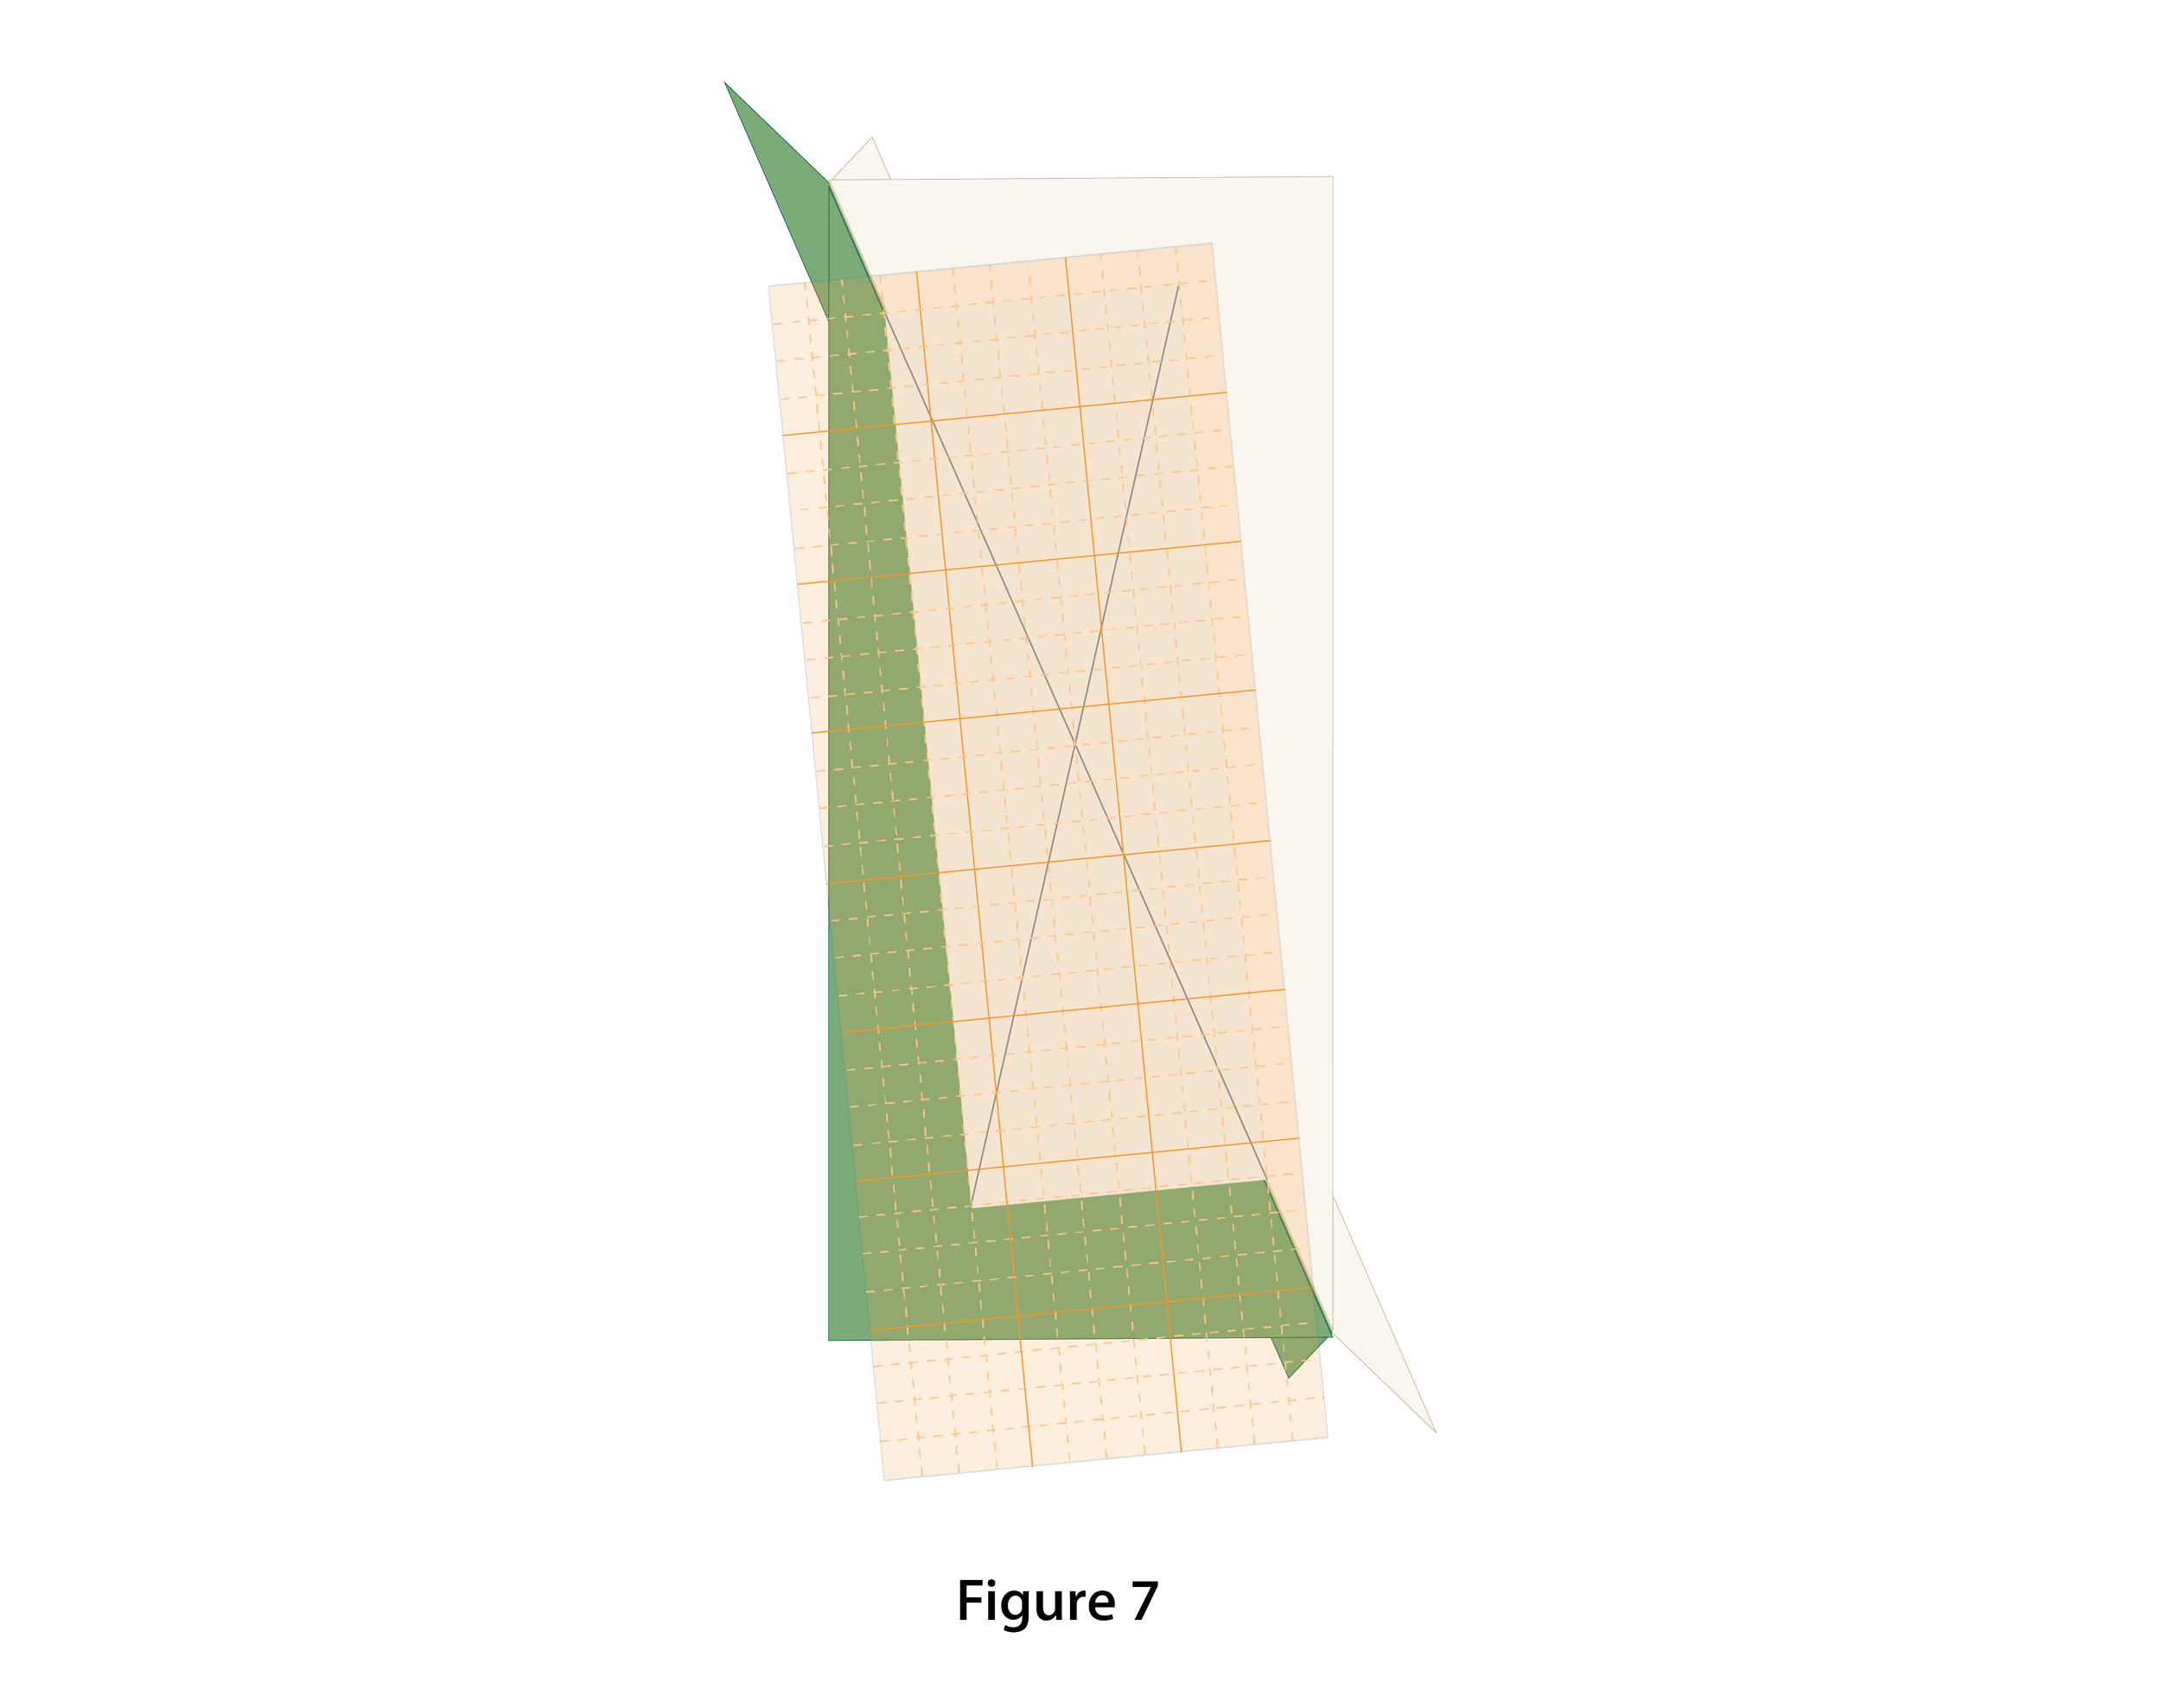
For trimming HRTs with seams going in the opposite direction, follow the directions above but using the other diagonal line. (Figure 7)
This method can be used for ANY size HRT without much thinking. All you need to know is what size finished HRT you want and you are good to go! I hope this will help take away any fear you might have when it comes to trimming HRTs.
Happy Trimming!